

Code Signing Mac OS X Projectors
Code signing your app allows the operating system to identify who signed your app and verify that your app hasn’t been modified since it was last signed. Your app’s executable code is protected by its signature because the signature becomes invalid if any of the executable code in the app bundle changes. The resources such as images aren’t signed; therefore, a change to these files doesn’t invalidate the signature. Code signing your app lets users trust that your app has been created by a source known to Apple and that it hasn’t been tampered with. All iOS apps and most Mac apps must be code signed and provisioned to launch on a device, to be distributed for testing, or to be submitted to the store
With the Mavericks version of Mac OS X (10.9.5) it is important to code sign the .APP file and in cases where you have an installer package, it will need code signing too. This page describes the steps to code sign a Director made app covering 3 stages - 1. downloading and installing the certificate, 2. setting up the projector appropriately, applying the certificate. To get a certificate, you must first register as an Apple Developer - https://developer.apple.com and request a certificate for: Developer ID Application
1. Downloading and installing the certificate
Also see the Mac Developer docs.
The steps below illustrate how Xcode can be used for certificate fownload and instalation. See the Mac Developer Library page on codesigning procedures that covers ow to use Keychain Access.
First download and install Xcode from the Appstore (it is free).
1. Choose Xcode > Preferences.
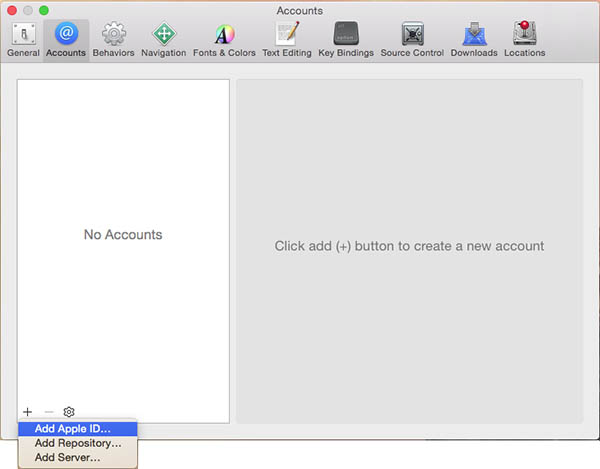
2. Click the Accounts tab at the top of the window.
3.
Click the + and choose Add Apple ID...
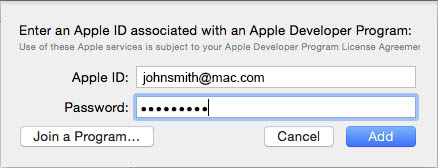
4.
Enter your Apple ID and Password and press Add.
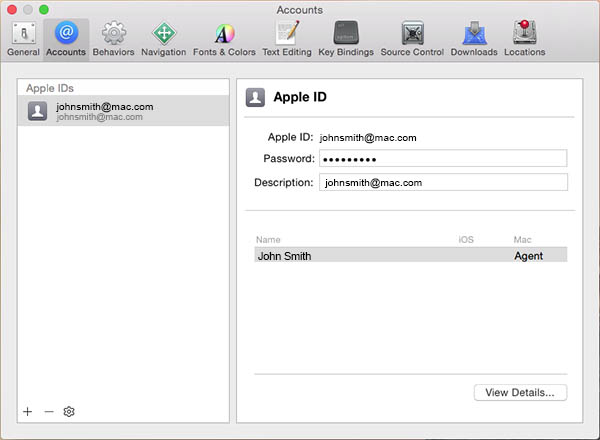
5. You will now see your account. Click the View Details button.
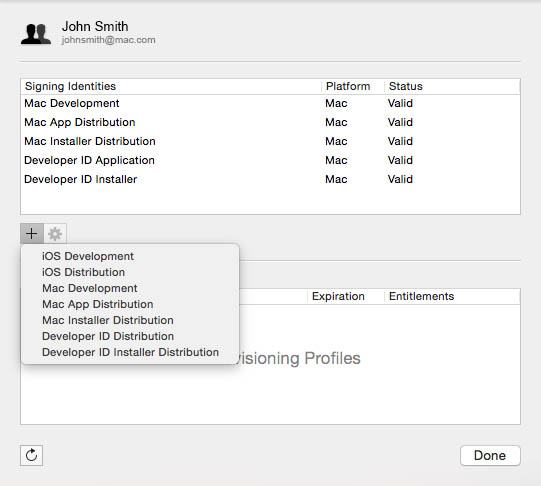
6. Click on the + button and choose the required certificates (Developer ID Distribution is the one demonstrated in this page).
For a description of each type of certificate, see Table 13-2.
7. In the Signing Identity Generated dialog that appears, click OK.
The new signing identity appears in the Signing Identities table.
8. Click Done
.
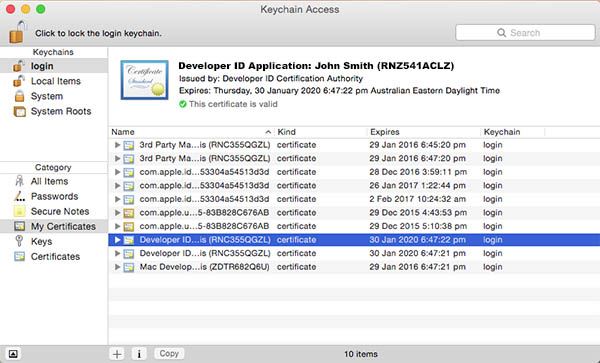
Checking the certificates are installed.
Use the Keychain Access utility to confirm the certificate is installed.
Take note of the Developer ID Application full title.
2. Setting up the Director Projector
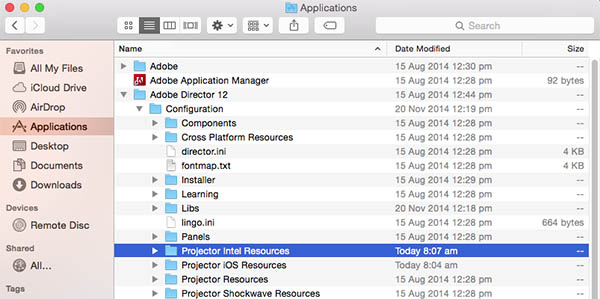
1. Make a copy of the Projector Intel Resources folder in the Adobe Director program folder -
Adobe Director 12/Configuration/Projector Intel Resources.
2. Delete PkgInfo in each of the following subfolder locations:
DPLib.framework
IMLLib.framework
ProjLib.framework
3. Edit Info.plist (with TextEdit) in the Contents folder particularly the line towards the bottom:
<key>ProjectorINIFile</key>
<string>projectorname.ini</string>
There are lines with Adobe Director copyright text. You can change those to your name.
There are other lines with the version number and bundle identifier. You can change those as well.
Change the name in the line below to your application name
<key>CFBundleExecutable</key>
<string>ProjectorName</string>
4. Create an ini file named to correspond to your projector - ProjectorName.ini. The first lines are:
[Movies]
Movie01=:ProjectorName.app:Contents:Resources:nameOfFirstMovie
Then you may have other settings like:
[Settings]
BackgroundAnimation=1
CenterStage=1
You can find the settings at:
Adobe Director 12/Configuration/director.ini
5. Once you have your ProjectorName.ini, place it in the Resources folder.
6. Also in the Resources folder, place your projector.icns file (the icons for your app). I kept the name projector.icns.
7. Rename the Projector Intel Resources folder to you ProjectorName.app and click OK to accept the name change.
You now have a sub projector.
8. To add content the app bundle, right click on ProjectorName.app and choose Show Package Contents.
9. Add all needed Xtras to the Contents folder, subfolder called Xtras.
10. Add all other Director content to the Resources folder.
You now should have a codesign friendly app bundle.
3. Code Signing the app
1. Open the Terminal utility and enter the codesign command line as below:
sudo codesign -f -s "Developer ID Application: John Smith (RNZ541ACLZ)" -v --prefix=com.publishername.appname --deep /Users/DU/Desktop/ProjectorName.app
Developer ID Application: John Smith (RNZ541ACLZ) is the exact title of the certificate as seen in Keychain Access.
com.johnsmith.ProjectorName - is the com.publishername.appname you want to name your file. It should correspond to what you inserted in Info.plist.
/Users/DU/Desktop/ProjectorName.app - is the path of your app bundle. In my case it is on the desktop.
All going well you should have a signed bundle message.
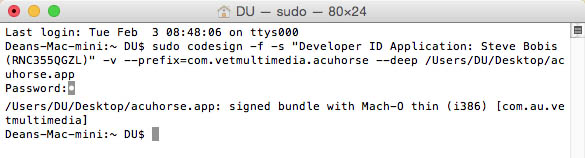
2. You should be prompted to add your admin password. Do this and then press Enter.
3. To verify code signing success, use:
codesign --verify --verbose /Users/DU/Desktop/ProjectorName.app
If you look into your app bundle, you should see a _CodeSignature folder under Contents.