

Tutorial 6: Synchronising sound
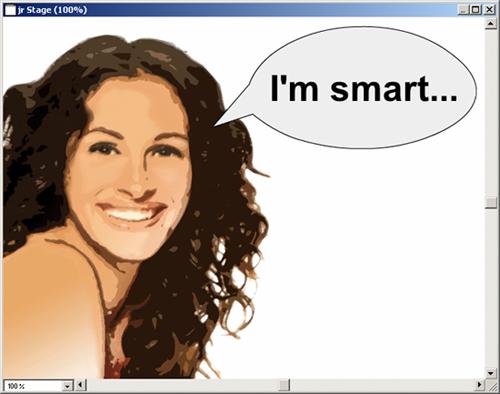
In this tutorial, we will be synchronising the voice
sound to text placed in a comic type text balloon. You will need to
download two files: JuliaRoberts.pct and smart.wav.
We will be using cue points to identify specific times within
the sound member. Cue Points can be created with Sound Forge XP (Windows)
or Sound Edit 16 (Macintosh). The first part of the tutorial will
create the cue points using SoundForge. If you don't have SoundForge
or Sound Edit 16, you can download the sound with the cue points already
added here smartCue.wav.
Adding Cue Points
- Open Sound Forge and open smart.wav.
Play the sound to hear what it contains.
- Click just before the start of the sound, and choose Special
> Drop Marker. A marker (cue appears in the sound with
the name similar to Marker
00:00:00.098. The marker name includes the time-code
of the point in the sound where the marker was placed.
- Move the mouse over the marker icon (at the top of the dashed line) and when the cursor changes to a hand, right click the icon, then choose edit from the window that appears.
- Change the marker name to "i'm smart".
- Add two more cue points as illustrated in the diagram below.
- Choose File > Save As, and note next to the Regions list option, you have selected Save Regions and Markers in .WAV files. (This should be be automatically selected.)
Synching the sound in Director
- Create a new movie with Stage size, 640 x 480 and
colour white.
- Choose File > Import and select the two files JuliaRoberts.pct and smart.wav you created and then click the Import button.
- A dialog box appears before importing for the pict image. Next
to Color Depth, select Image (8 bits) and next to Palette, select Import. Press the OK button.
- Open the Vector Shape window and create a text balloon as shown
below. The graphic can be made by first drawing an ellipse, then
adding corner points with the pen tool and moving them with the
arrow tool. Close the Vector Shape window.
- Open the Text window and type the text "I'm smart.." in Arial
(or Helvetica), bold, 48 point as shown below.
- Click the New Cast Member button
 and create a new text member with the words "I'm rich..." with the
same formatting. Repeat this step adding the text "Do you want a
job?" The text should be 36 point and extend over two lines. Close
the Text window.
and create a new text member with the words "I'm rich..." with the
same formatting. Repeat this step adding the text "Do you want a
job?" The text should be 36 point and extend over two lines. Close
the Text window.
- From the Cast window, select the JuliaRoberts image and
place it onto the Stage, dragging it to align to the bottom left
corner. In the Score, extend this sprite from frame 1 to 34.
- Click and drag the text balloon member in channel 2, and extend
the sprite from frame 5 to 34. Change the Ink Effect of the balloon
sprite to Background Transparent. On the Stage position
and size the balloon approximately as shown below.
- Drag the text member created in step 6 into channel 3, and extend
the sprite from frame 5 to frame 14. On the Stage position the sprite
as shown below.
- Place the text members created in step 6 in channel 3, extending
from frame 15 to 24 and 25 to 34 respectively. Position all the
text sprites centred over the text balloon (as shown above).
- Click and drag the smart sound cast member from the Cast
window to sound channel 1. Extend the sound sprite from frame 1
to frame 34.
- Double click frame 4 in the tempo channel. In the dialogue box
that appears, click Wait for Cue Point, and select
cue point 1: iĺm smart from the Cue Point pop-up
menu.
- Create a wait for cue point 2: iĺm rich working
in frame 14, one for 3: do you in frame 24 and {End} in frame 34 of the tempo channel.
- Rewind and play the movie.
The sound should be synchronized with the words as they appear on the Stage.
Now would be a great time to save your movie as tut6.
You can see the completed Tutorial 6 here - tut6_fin.dir