
Character Control
Moving objects in Shockwave 3D
 Before you start, you will need to download the following Director movie
- 3Denv.dir, which contains a 3DS Max created
shockwave 3D cast member.
Before you start, you will need to download the following Director movie
- 3Denv.dir, which contains a 3DS Max created
shockwave 3D cast member.
2.Ā Create a new behavior attached to the 3D sprite as follows:
-- create properties for when arrow keys are pressed
-- properties will either be TRUE or FALSE values
property pLeftArrow,
pRightArrow, pDownArrow, pUpArrow
property p3DmemberĀ
-- reference to 3D cast member
property pCharacter --
character in the 3D world
on beginSprite me
Ā -- initiate properties and 3D world
Ā p3Dmember = sprite(me.spriteNum).member
Ā p3Dmember.resetWorld()
Ā pCharacter
= p3Dmember.model("character")
Ā -- we must define pCharacter after we use the
Ā -- resetWorld() command
otherwise this variable
Ā -- object will be deleted
Ā createLight
end
The 3D Lingo statements above are similar to the last
tutorial except for the creation of a few new property variables. pLeftArrow,
pRightArrow, pDownArrow, pUpArrow will tell us when the
arrow keys are being pressed (TRUE value) and when they are released (FALSE
value). We created a variable reference to the 3D
character in the world, making it easier to refer to this object throughout
the script. You will note that I defined the pCharacter
after the resetWorld() command. If I would
have defined it before, then resetWorld() would
have removed the variable from memory.
3.Ā Continue the script as follows:
on createLight
Ā -- create a point 'bulb' type light
Ā p3Dmember.newLight("Bulb Light", #point
)
Ā -- position the light
Ā p3Dmember.light("Bulb Light").transform.position
= \
vector(0,0,100)
Ā -- Make the character model a parent of the light
Ā -- Bulb Light becomes a child of pCharacter
Ā -- This is done so that the light will always move
Ā -- with the character.
Ā pCharacter.addChild(p3Dmember.light
\
("Bulb Light"),#preserveParent)
end
Once again, the code is similar to the last tutorial but with an additional
statement to create a parent-child relationship (explained in the comments).
You can read more about parent-child relationship in 3D at my The make-up of shockwave 3D casts page.
4. Next we will create the keyboard control of the character.
Continue by adding the following to the same script:
on keyDown
Ā -- check to see which key has been pressed
Ā -- and set the property relating
to that key to TRUE
Ā -- 123 = left arrow key
Ā if keypressed(123) then pLeftArrowĀ=
TRUE
Ā -- 124 = right arrow key
Ā if keypressed(124) then pRightArrow
= TRUE
Ā -- 125 = down arrow key
Ā if keypressed(125) then pDownArrowĀ=
TRUE
Ā -- 126 = up arrow key
Ā if keypressed(126) then pUpArrowĀ=
TRUE
end
If you did my cubicVR tutorial, you will notice
I am using different Lingo to do the same thing. Here, I am using if..then.
In the other tutorial I used case. I am also
using keypressed instead of the
keycode. Look at both tutorials and use whichever you feel most comfortable with. Both work fine.
on keyUp
Ā -- when the arrow keys are released,
Ā -- set the properties to FALSE
Ā pLeftArrowĀĀ
= FALSE
Ā pRightArrowĀ
= FALSE
Ā pUpArrowĀĀĀĀ
= FALSE
Ā pDownArrowĀĀ
= FALSE
end
on exitFrame
Ā characterMove
end
on characterMove
Ā -- if the right arrow is pressed,
Ā -- rotate the character 5 degrees about the z-axis
Ā if pRightArrow then pCharacter.rotate(0,0,-5)
We could have rotated the character relative to its parent or
world position. By not specifying a relativeTo
parameter, the default of #self is used, which
is relative to the nodeÆs local co-ordinate system.
Ā --if the right arrow is pressed,
Ā -- rotate character -5 degrees about the z-axis
Ā if pLeftArrow then pCharacter.rotate(0,0,5)
Ā -- if the up arrow is pressed,
Ā -- move the character 5 pixels along the y-axis
Ā if pUpArrow then pCharacter.translate(0,5,0)
Ā -- if the down arrow is pressed,
Ā -- move the character -5 pixels along the y-axis
Ā if pDownArrow then pCharacter.translate(0,-5,0)
end
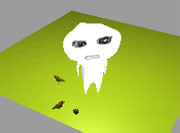
5.Ā Play the movie and use the arrow keys
to move the character model around. Note what happens with the light.
6. Sometimes it is useful to be able to press a button
to bring back your model to its original position in the 3D world. Now, we'll do just that. First, we have to find the starting location of the character.
In the Message window type the following, then press ENTER:
member("scene").resetWorld()
I could not type p3Dmember.resetWorld() and make it work
because p3Dmember is not a global variable but a property
related the script.
In the Message window, type the following, then press ENTER:
put member("scene").model("character").transform.position
This returns the vector location of the character, which we will now use.
7. In the keyDown handler, add the following before the
end statement.
Ā if keypressed("r") then resetCharacter
Create a new handler (perhaps after the keyUp
handler) as follows:
on resetCharacter
Ā pCharacter.transform.position = \
vector(26.5860, 27.4024, 41.8902)
end
A better way of scripting the above and avoid hard coding the vector starting
location of the character, would be to create a variable in the beginSprite
handler that stores the position before the character moves. Try do this
on your own.
8.Ā Play the movie and test what you just created.
You can download the completed movie
from here.